Showing posts with label easy bake. Show all posts

Thursday, January 22, 2015

Sausage Rolls - Perfect for winter evenings

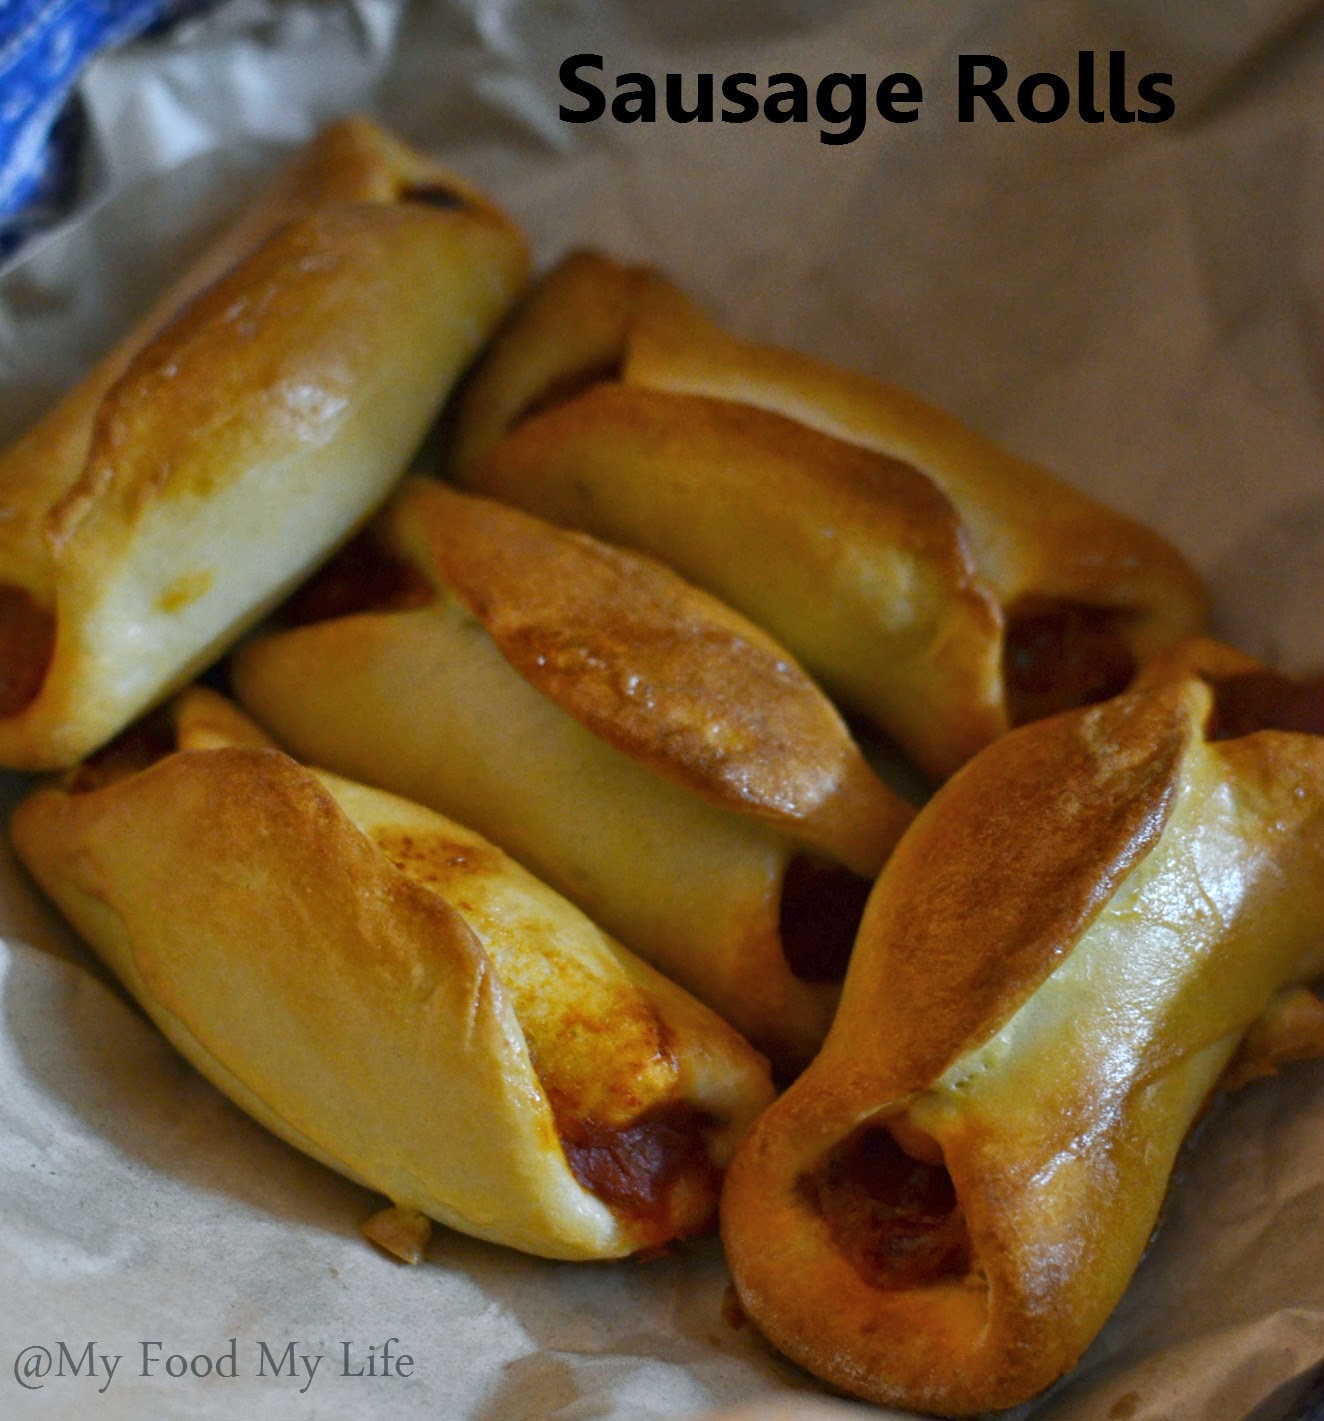
I love winter afternoons. They are perfect to do some baking..perfect to dole out some goodies from my kitchen...perfect to show my loved ones that I love them! The aroma of baking fresh bread at home just adds to the pleasure. So today I made this very easy Sausage Rolls just perfect to go with your evening cuppa.


Ingredients:

Flour / Maida - 1 1/2 cup + a little more to adjust the dough

Instant yeast - 1 pack - approx. 7 gms

Salt - 1 tsp

Sugar - 1 tsp

Milk - half cup

Olive oil - 2 tsp

For the filling:

Chicken sausages - 12 nos

Readymade pasta sauce - few tbsps.

Grated parmesan cheese - approx. 2 tbsp.

Method:

Making the dough.

In a bowl add the flour ,instant yeast , salt and sugar. Add the milk gently and bind into a dough. Add the olive oil and knead the dough on a floured surface for atleast 10-12 mins till its soft, smooth and springy.

Place the dough in an oiled bowl, cover with cling film and keep in a warm place. I usually place it inside the microwave.

Let the dough rise for an hour. It will become double the size. take it out on a floured surface and knock down the dough gently.

Now make 12 small sized balls from the dough. Roll out each into small rounds - like puris but not very thin.

Apply some pasta sauce, place a cocktail sausage and sprinkle some grated parmesan cheese. Fold the two sides into the centre in the shape of a roll.
Follow the same process to make all the rolls.

Place each of the rolls in an oiled baking tray. You could also line the tray with some foil paper. Cover with a cling and let them rise again for 20 mins. Brush the rolls with some lightly beaten eggs.

Bake in a preheated oven for 20 mins at 180 degree centigrade.

Serve hot staright out of the oven . It even stores well for upto 2 days.


I had made a few dozens of these sausage rolls for KFB's maiden Bake sale and they were my bestsellers! Extremely easy to make and lovely to eat..what more does one want from life.


Sunday, November 30, 2014

Oats and Sunflower Seeds Cookies

I am not much of a baker as I lack patience. But once in a while I do like to whip up some goodies for my little boy. This easy oats cookies recipe caught my fancy and I perked up the health quotient by adding some sunflower seeds to it. The original recipe also called for dried cranberries but I substituted that with some raisins. It can be a good option for kiddie tiffin box too. Trust me your kid will not be able to resist the aroma of this freshly baked cookies!


Ingredients:

Sunflower seeds - 4 tbsp.

Olive oil - 2 tbsp.

Butter - 50 gms - I used Amul butter

Castor sugar - 1 cup

Egg - 1

Wholewheat flour - half a cup

Oats - 1 cup - I used the regular rolled oats that we use for breakfast

Raisins - a handful

Vanilla essence - 1 tsp

Method:

Preheat the oven to 180 deg C. Grease and line a baking tray.

Dry roast the sunflower seeds and grind into a fine paste adding 2 tbsp olive oil.

Mix together the butter and sugar until pale and creamy. Gradually beat in the egg, the mix in the wheat flour and the oats. Mix in the sunflower seeds paste, then stir in the vanilla essence and the raisins.

Place heaped tbsp full of the mixture on the baking tray, spacing them well apart.

Bake in the oven for 10 mins until golden. Leave on baking tray for a few minutes, then transfer to a wire rack to cool.

Serve warm or store for later use.


Notes:

  • You could substitute raisins with any nut of your choice.
  • Keep an eye while baking the cooking as they take very little time.
  • Sunflower seeds could be substituted with flax seeds too.


Wednesday, August 6, 2014

Calzones - For those days when you really want to be happy!

After eons today I baked bread! It is so therapeutic cant express in words. And when the fresh aroma of bread fills your home you will be so happy. I made Calzones. Stuffed with a spicy cheesy filling. I used my basic buns recipe and it turned out great. Made a filling of whatever I could lay my hands on - some home made paneer, some grated cheddar and mozzarella tossed in some ready to use pizza sauce..voila! It turned out a winner at my very first attempt.


Ingredients:

For the bread dough:

Plain flour - 2 cups + a little for dusting

Warm milk - 1 cup

Fast action dried yeast/Instant yeast - 2 tsp

Salt - 1 tsp

Sugar - 1 tsp

Olive oil - 2 tbsp.

Method:

In a bowl put the flour,yeast and the sugar. Make a well and add the warm milk - as much required to make a soft pliable dough. Add the salt and the olive oil and knead well on a lightly dusted surface for atleast 10 mins.

The dough should be soft and springy to touch. Put it in a greased bowl and leave it in a warm place to rest for an hour.I usually stuff it inside my microwave. The dough will double in size by now.

In the mean while make the filling. Recipe listed below.

Take the dough out on a lightly floured surface again and knock it down gently. Put it back into the greased bowl and let it rest again for 20 mins.

For the filling:

Grated paneer - 1 cup

Grated cheddar - 1/2 cup

Grated mozzarella - 1/2 cup

Onion - 1 medium - finely chopped

Parsely leaves - a handful - finely chopped

Pizza sauce - 2 tbsp. - I used the ready made one. You could even use some tomato ketchup.

Olive oil - 1 tsp

Salt -to taste

Pepper - to taste

Method:


In a non stick pan heat the olive oil. Lightly sauté the onions. Add the grated paneer and the pizza sace and mix well. Add the chopped parsley and the grated cheese. Season with salt and pepper. Remove from heat and keep aside.


Now to make the calzones. Make little balls of the dough and roll it out flat. Like we roll out pooris/luchis but not very thin.

Take a spoonful of the filling and lay in in the centre. Fold into a half moon.


With a fork , neatly press the edges to make a design. Make sure its properly pressed or else the filling will pop out while baking. Similarly make the rest of the calzones. It makes about 8. Brush the calzone with a mix of little milk and butter.

Lay them neatly on a baking tray lined with aluminium foil. Bake in a pre heated oven at 180 degrees for 20 mins. Brush them again after 10 mins of baking with the milk -butter mixture to get that lovely colour on top.

Take them off the oven once done. Let it cool a bit before serving.


Notes:
  • Make sure you knead the dough well atleast for 10 mins. This will result in softer bread.
  • You can use any filling. Chicken or mushroom or some vegetables sautéed together. Just about anything would do.
  • Don't forget to brush the calzones with the milk butter mixture while baking to get that beautiful colour.
  • Press the edges of the calzones well or else the filling oozes out.
Happy Baking my friends!
 

Sunday, July 6, 2014

Mixed Berry Tea Loaf

On my last visit to the neighbourhood supermarket I got fascinated by rows of dried berries and fruits on display. I have been seeing a lot of my blogger friends settled abroad enjoying fresh berries and whipping up these amazing bakes. Staying in Kolkata I don't have such luck - fresh berries are not easily available and even if they are, not in my vicinity. There was this recipe of a tea loaf that had been lingering on my mind for a while now ..it would be perfect to load it up with these gorgeous berries. I chose to go with some dried cranberries,cherries and also some melons and oranges.There I was all set to bake my Mixed Berry Tea Loaf.


Ingredients:

Plain flour - 1 cup

Butter - 100 gms - at room temp - I used Amul butter

Castor Sugar - 1 cup

Eggs - 2 nos - at room temp

Vanilla essence - 1 tsp

Baking powder - 1 tsp

Dried mixed berries and fruits - 1 cup - finely chopped

Method:

Preheat oven to 165 - 170 C.

Grease and line a loaf tin.

Sieve the flour along with the baking powder and keep aside.


Roll the chopped dried fruits and berries in some flour and keep aside. This step is essential to ensure that the fruits don't sink to the bottom of the pan while baking.

In a bowl cream together the butter and sugar with a hand blender. Blend for atleast 3 to 4 mins till the mixture is light and fluffy.

At this point also add the vanilla essence. Mix well.

Add one egg at a time ,mixing well after each addition.

Fold in the flour - baking powder mix gently with a spatula. Add the chopped dried fruits and fold that in too. Keep some aside to garnish on top of the batter.


Pour the batter into the greased tin and bake at 165 -170C for 25- 30 mins or till a knife comes out clean when inserted into the cake. Pls keep a check as different ovens behave differently.


Happy Baking everyone..its not as difficult as it looks. It only requires some patience and precision!

Wednesday, July 2, 2014

My date with an ace baker - Pooja Dhingra and some Choco Squares from her book "The Big Book of Treats"

Le 15 Patisserie...Pooja Dhingra...rings a bell!?! Yes she is one of the country's top baker and is surely going places. It is not everyday that you get a chance to meet and then blog about such unique experiences. Well the thing is that I have been following her on Instagram for sometime now and have been mighty impressed with the things shes been doing - be it her take on classic desserts or some mind blowing innovations! I mean who would think of Macaron Cheese cakes!!! Yes that's Pooja Dhingra for you. It is her passion for baking that shines through. Armed with a degree from worlds best culinary school ,The LCB , Paris, shes an achiever with great entrepreneurial skills. Being listed in the Forbes Under 30 Entreprenuer list is no joke.


A chance call from a fellow blogger and I found myself being a part of the launch of her popular book "The Big Book of Treats" in Kolkata. The venue chosen was perfect- The Corner Courtyard. Beautiful property that serves up some great food. My fellow bloggers have had some amazing gastronomical experiences there. Read about it here and here.
I reached the venue and was ushered into a packed hall full with baking enthusiasts from all over the city. I took my seat along with Amrita and Sayantani and waited for Pooja to start the private class. And there she was smiling all along and I thought to myself such a pleasing personality - soft spoken,so calm and down to earth. She taught the class 3 basic recipes of cupcakes,cookies and nutella squares but what is worth mentioning are the invaluable tips she provided along with. My regular readers know that I dread baking, its a culinary zone I push myself hard into so getting these tips from the master baker herself was so enlightening.
 
Pic taken from Amrita Gill
She was open to questions and queries and very happily posed for pictures and signed her book. I too got my copy signed by her ( my first signed book) and posed along with her. I came back home all charged up to try recipes from her book. The folks at The Corner Courtyard made sure that the guests are well taken care of with yummies doing the rounds every now and then. We also had the privilege of tasting the goodies she baked that evening - Vanilla cupcakes with frosting , Choco chip cookies and Nutella squares.

Pic taken from Amrita Gill

Pic taken from Amrita Gill
 
Once I got back home I was all set to try out a recipe from her book so I chose to bake some Nutella squares but with some changes. I followed the basic squares recipe and instead of Nutella used some chocolate sauce for the topping. They turned out super and I am now getting the confidence to try out a few more recipes.


Recipe from The Big Book of Treats

Ingredients:

Dark Chocolate - 75 gms

Butter - 125 gms

Brown Sugar - 50 gms

Flour - 100 gms

Oats - 75 gms

Hersheys chocolate syrup - 1 cup

Sprinkles - for garnish

Method:

In a microwave melt the dark chocolate and butter and leave it to cool.

Add the brown sugar and whisk till combined properly.

Fold in the flour with a spatulaand then add the oats and mix.

Preheat the oven to 180C and grease an 8 inch tin. Pour the mix.

Bake for 15 -20 mins.

Once cool, spread the chocolate syrup evenly on top, decorate with sprinkles or nuts(in the original recipe).


Before I end the post, I must share with you all some basic baking tips that I picked up for Pooja Dhingra.

  • Always add flavours while creaming the butter as it absorbs better that ways.
  • Spend atleast 3-5 mins on creaming as it helps the cake to rise.
  • Scraping down the bowl every now and then is important
  • Sifting the flour is an important step, so is dry whisking.
  • Use piping bag to fill cupcake liners evenly
  • And above all never be afraid to experiment and create your unique flavours and combinations!
Happy baking till then! 

Monday, September 16, 2013

Chocolate Chip Muffins with Vanilla Sugar

 
pic from google


It was Teachers Day and I wanted the kiddo to take something homemade for his teachers. It has been a tradition of sorts. As kids we would always take a handmade card and some home made goodies for my teachers. Maa would make sure that she baked something and I have also started doing the same. I also remember taking flowers from our garden for my teachers but never anything fancy or expensive. That somehow never appealed to me...the joy of making a card at home is something else and I encourage the little one to follow the same. So here is the recipe for very easy Chocolate Chip Muffins with Vanilla Sugar. The recipe has been broadly adapted from here


Ingredients:

Flour - 1 and 1/2 cup

Granulated sugar - 1/2 cup

Baking powder - 2 tsp

Milk - 1 cup - room temperature

Butter - 1/2 cup melted

Egg - 1 medium

White /Dark chocolate chips - 1 cup

Vanilla essence - 1 tsp

Vanilla sugar - 2 tbsp - or you can use brown sugar instead

Method:

In a bowl combine the flour ,sugar ,baking powder and the chocolate chips. Mix well.

In another bowl , combine the milk ,melted butter, vanilla essence and the egg. Blend well into a smooth mixture.

Add the dry ingredients in two parts - mixing well after each addition. 

Grease and line a muffin /cupcake tin.

Fill the batter 3/4 th into each cup. Sprinkle some vanilla sugar /brown sugar on top.
Bake in a preheated oven at 200 degrees Celsius for 25- 30 mins or till a tooth pick comes out clean.


 Yes..my little boy was very happy to take these for his teachers and they loved it too!


Tuesday, September 10, 2013

Know Your Kolkata Food Blogger - This week it's Amrita of Sweet 'n' Savoury and one of her recipes.

So I am back with the 'Know your Kolkata Food Blogger Event' and this week it is the very talented baker Amrita (of the Amrita - Vishal blogger duo) of the lovely blog Sweet 'n' Savoury. Amrita and Vishal are a husband and wife team who share the passion for good food and cooking good food. Infact this event is a result of her idea! While Amrita is the one who contributes to the Sweet part of the blog with her amazing bakes..its Vishal who balances the Savoury part with his lip smacking creations. Just saying that Amrita is a baker par excellence would be an understatement. She amazes me every time with her creations. I for one is someone who treads very carefully when it comes to baking...so she is truly an inspiration. A very unique quality of her blog is the proportion of ingredients that she uses ..they are not humongous , so you are not left with huge portions of your creations worrying how to finish them. 
Her blog is filled with some very nice recipes that can surely be tried by everyone. I have chosen a relatively easy recipe and given it a small twist of mine. Few days back she had posted a recipe of Masala Biscuits and I found it very interesting. Considering the two boys in my house are not too fond of spices like curry leaves and green chillies I just made a few changes keeping the basic recipe intact. Here's my recipe of Cheesy Masala Biscuits 


Ingredients:

Flour - 4 tbsp

Atta/whole wheat flour - 3 tbsp

Rice flour - 2 tbsp

Baking powder - 1/4th tsp

Baking soda - a pinch

Sugar - 1 tsp

Curd/yogurt - 1 tbsp cold

Butter - 2 tbsp - cold

Roasted cumin powder - 1 tsp

Cheddar cheese - 1 cube grated

Ginger - 1 tsp minced

Method: 


In a bowl mix together - flour . atta, rice flour , baking powder ,baking soda and sugar.

Add the butter and rub into the flour mixture till it resembles bread crumbs like texture.

Add the roasted cumin powder , minced ginger and the grated cheese.

Add the cold yogurt/curd and bind the mixture into a dough. Cover with cling film and refrigerate for 1 hour.

After one hour , roll out the dough into a thin sheet on a floured surface. Using your cookie cutter cut out desired shapes and place them on a baking tray that has been lined with a baking/parchment paper. 


Preheat oven to 180 degree Celsius and bake the biscuits for around 20 mins - till they turn light brown in colour.


Let the biscuits cool so that they get crispy and then store in an airtight jar for few days.
Enjoy these delicious biscuits with your dose of tea/coffee.


 Notes : 
  •  I skipped adding salt seperately considering cheddar is pretty salty and it turned out just fine.
  • The addition of cheese tends to make the dough very soft while rolling ..so use enough flour while rolling out the dough.
  • I used mini cookie cutters here. 
 Amrita hope you have liked my version of your recipe. Folks do check out their blog for some yummy desserts,bakes and much more -Sweet 'n' Savoury


Thursday, July 25, 2013

Sweet Nothings Part Deux - Vanilla Tarts with Chocolate Raspberry Ganache

Exactly a year ago I had started writing this blog.Then, what I didn't know is this will become  so dear to me. This blog 'My Food My Life' has kind of become my identity. I am constantly craving to do more, to do something better.When I first started posting I didn't even have a camera to click food pics but now that is another sphere I am getting to learn. Making a dish from scratch , styling , photographing - everything is so exhilarating. And I am loving every bit of bit. I have made friends...I have come to know people...learn from them...teach them a few things..and its only getting better. 
Today's recipe is again my foray into  'not-so-confident' domain...baking...dessert...pastry making. But no harm in trying ( except of course the waste of ingredients!) What the heck,the least I can do is try. So the other day I was out again on one of my loitering trips to the supermarket. Lost in my thoughts, not an iota of idea on what I have to buy ,gazing through racks and racks of things - jams, sauces , pastas, lentils , rice , spices. It was then I chanced upon a tin of raspberries..and immediately I started thinking of the various desserts I could  make!!!! Without any further deliberation I just picked it up. On reaching home I started looking up for recipes and the best seemed to make a raspberry tart - oh- so-delicious.  All my high hopes were shattered once I opened the tin - what came out was a mound of squished raspberries in a very tangy syrup.So there my dreams of making a raspberry tart flew out of the window. But thou isn't one to give up so easily. I thought of making something easier and using up the raspberries nevertheless. So here's presenting the very delicious Vanilla Tarts with Chocolate Raspberry Ganache


Ingredients:

For the pastry:

Plain Flour - 200 gms

Butter - 80 gms at room temperature

Castor sugar - 50 gms ( you can use powdered sugar too)

Egg - 1 no lightly whisked

Vanilla extract - 1 tsp

Since I used Amul butter no need for extra salt

Other ingredients:

Vanilla custard - 2 cups ( made according to the instructions given on the pack)

Dark chocolate - 100 gms

Cream - 100 gms ( I used Amul cream)

Raspberry - 2-3 tbsp ( can substitute with any jam of your choice)

Method:

First we have to make the pastry. That is in fact the only cooking part rest is just assembling!

In a bowl cream the butter and sugar till pale in colour. Add the egg and whisk well.
Now gradually add the flour and bind into a soft dough. If the dough feels sticky you can add a little more flour. Cover the dough with a cling film and refrigerate for 30 mins.


After 30 mins , roll the dough on a lightly floured surface to cover the pastry tins.I used small tins .You could use small muffin cups too. 


Once the pastry/tart tins are covered with the rolled pastry dough just make small pricks all over so as to prevent the tarts from rising while we bake.Refrigerate the ready tart tins for another 10 mins.
Next preheat the oven to 180 deg C and bake the tarts for 15-20 mins. Till they turn light brown in colour.


Once the tart shells cool down , fill in with the prepared custard and chill in the fridge for 30 mins.


Now we have to prepare the ganache. Melt the chocolate on a double boiler or the microwave . Mix in the cream and raspberries and mix everything gently into a smooth sauce.


Fill a piping bag with the ganache and chill it for 30 mins. Take the custard filled tarts and make a design of your choice with the ganache. Top with a cherry or raspberryry and serve.


Variations - If you get fresh raspberries or strawberries you could avoid the chocolate ganache and top the custard with some of the fruits.